Saturday, August 27, 2011

Popin' Cookin' Soft Cream Pt 2

Silvy here, reporting for the continuation of our experiment :)

So the last you saw was on the cream in the piping tube. We started making ice creams! Trust me, it's harder than it looks!! Especially when we have giant hands that are unused to creating tiny items.
The silly mistake I made here was to snip off the tip a wee bit too big, so our works ended up looking rather clumsy :(


Here's how it looks like, with Spire holding it up to the camera


I call this the wafer boat, and our task is to fill this up and decorate it as creatively as we could. Well, we tried anyway haha.

So first, according to the illustration (because we couldn't read Japanese) was to pad the bottom with some wafer bits, which we did.

Time to fill up the boat! This was pretty fun, since it doesn't really require absolute precision skills! :D

So once the base has been covered, Spire proceeded to decorate the top...with swirls! :D

Yay one is done! Of course, it's not exactly perfect or awesome at the moment, but the basic boat is done anyway.

Creative-time! Spire continues by adding Hershey-like drops to the boat. This was fun, though the cream was pretty thick that it became fiddly to get the shapes the same for all.

Oh noes, one side of it drooped! :( But no worries, we had something worked out just for that in the end, you'll see :D
Spire sez: By this point, the thing kinda looked like a sea slug :P
See? Sprinkles and wafer sticks make the boat looks nicer now! All right all right I'm probably exaggerating that a bit, but it's the best we could do! Not bad for two beginners on these fiddly sweets XD

Now that the boat is somewhat done, let's move on to the next sweet. It's time for some soft cream on cones! It's now my turn to start first, and it was HARD. I couldn't stop laughing to the point that my hands were really shaky.


Hmmm....Pink poop?

My attempt looks weird, and it made me want to redo the whole thing from scratch! :(

And the Spire had her turn, and check out how she started hers! It goes to show my creative thinking has just gone down the drain when I started on mine *facepalm*

So we see Spire hard at work with that teeny tiny ice cream of hers :D

Yay the ice cream is done, complete with a stick of wafer stuck to its side too! :D

I didn't like mine looking so weird and ugly, so I tried redo-ing it again. Now it looks like a gigantic sized ice cream hahaha. The one on the left is done by Spire and the one on the right is mine. Yes, both have been sprinkle-fied! :D

And onwards we go to our next ice cream creation! This time it's wafer ice cream. This one was a wee bit more annoying to get it done right cause we totally didn't follow the instructions....much. Hahaha


So I snapped the wafer...only to realize that I should have used the plastic spatula that was included in the set. Now it looks rather ugly :(

We staaaaared at the wafer trying to figure out what to do with it, so here's some experimentation!

Pink flower atop the wafer, decorated with sprinkles? Okay, worth a shot!

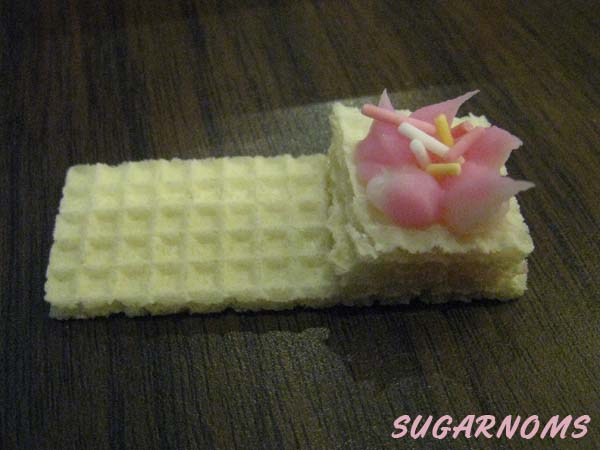
So we decided to stick the wafers together (using a dab of the same cream to stick them together) and now it looks like a slipper.

More sprinkles! At that point of time we had really far too much sprinkles so why not add some glamour to the creations? XD

So after a couple of cursing moments, a dash of creativity, and a whole load of fun and laughter, we present to you the final end results of the Popin' Cookin' Soft Cream!

Ta-dah!!! The dishes are served :)

My stomach wasn't feel all too well when we were getting this done so Spire had about 90% of the sweets displayed on the table. Well, I took the ice cream that I made anyway. And somehow the sweets didn't agree with Spire's tummy so she ended up in the toilet for a moment. Whoops! :x

My ratings? Not bad for a DIY kit but definitely not great for kids, and the taste isn't that good either.

Spire sez: If your kids/selves have decoden skills, you might enjoy this more, I think the taste was a bit off because the kit was a little close to expiry but otherwise the overdose of cream-stuff probably isn't good for you anyway.

Silvy's Ratings
Flavor: 2/5
Price: 3/5
DIY level: Medium
Fun: 4/5

Spire's Ratings
Flavor: 3/5
Price: 3/5
DIY level: Medium
Fun: 3/5

Friday, August 26, 2011

Fushigina Mizu Ame - Liquid Candy Kit

Spire here, and this is Fushigina Mizu Ame - or dang its a wizard, hey wait I think its a DIY kit, I hope I'm not wrong!

I got it at Empire Subang for about RM 4-ish and I have to say for its contents it was kinda a waste of money. Unless of course you fell into the 'hey it looks affordable' trap, but I digress.

Coris also makes a lot of these 'magical mixing kit' type candy so I assumed that it would be similar. Looking at it (I don't understand an ounce of Japanese, seriously) I though it had to do with some magically changing colours or SOMETHING because there was a wizard on the front.

So Sil and I opened up the box and we got three sachets of gooey liquid, a spatula and a rather large plastic mixing container which made me wonder what was so magical about this that it needed such a huge container.

Basically you get three extremely gooey syrup things inside. One is strawberry flavour, which is the sweetest smelling but sourest tasting, orange flavour which was kinda ok and soda/ramune flavour, which was the mildest and it was completely transparent, I would have mistaken it for glue had it not come with the kit.

I would have taken pictures of it but my fingers were so gummed up that it was near impossible. Also thanks to Akane for translating it for us, if not we'd never have figured out what the thing was supposed to do.

Apparently if you mix the different flavors together you get different tastes. And when/if you pour all of them together, you get a 'popular soda flavour' which basically means it tastes like sour Coke. And that was it. Really, that was it.

The overall taste wasn't too bad but I felt like I had downed a full cup of corn syrup or pure glucose, so I really wouldn't feed this to any of your kids if they're below 15, seriously. Its so messy you could use it as flypaper. Magnificent flypaper.

Silvy says: It's pretty much a no-brainer since you just gotta mix the sticky goo in the container given with the spatula. The fun comes when you start coming up with imaginative ideas on what to do with that sticky mess!


Spire's Ratings
Flavor: 4/5
Price: 3/5
DIY level: Non-existant
Fun: ???

Silvy's Ratings
Flavor: 4/5
Price: 3/5
DIY level: Superbly easy
Fun: 3/5

Thursday, August 25, 2011

Introductory Post: Popin' Cookin' Soft Cream Pt 1

Spire here, and welcome to SugarNom's first ever *proper* posting!

Sil and I decided to start this here blog because I had developed a habit of searching out and trying these newfangled Japanese DIY candies and other random whatnot which is probably destroying my teeth as we speak.

To start, I came across these two sets a few months back, the Popin' Cookin' Sushi and Soft Cream sets.Mmmm pinkWe decided to start with the Soft Cream set first because it was smaller, and thank goodness it wasn't too hard to figure out what to do seeming the entirety of the thing was in Japanese.

But basically with this kit you'll be able to make 2 soft serve ice creams, a tart of some sort and a cake of some sort, with the wafers inside. The set cost about RM12 and I got it at a Japanese fair that was happening in Empire Subang at the time. When opened...box in a box! With instructions!
This is pretty much what it looks like with the wrapper removed. Inside were 2 ice cream cones, two different sizes of wafers, a bag of sprinkles, a small green spatula-spoon thing, a clear plastic piping bag and lastly two sachets of powder, one for vanilla 'cream' and another for strawberry 'cream' The box itself serves as a place for you to stand up your ice creams and to mix your 'cream' up as per instructions. One corner of the box can be snapped off to use as a measuring cup for the water you need for this whole endeavor.

EPIC SPRINKLES CLOSEUP!Now sorry for the semi-crappy image quality, we decided to hang out in Coffee Bean to do this because well, freeflow water? And also, waaaaafers.

So first you chop off the little triangle shaped water measure thing and fill it to the indicator. Then you pour out the powder into the compartments like below. Both will be pure white till it gets a hit of water.
Then you stir like the wind! The stuff will turn into a creamy, extremely sweet smelling 'cream' of somekind that makes you wonder if Japan could survive on just miracle powder and water alone. Then when you're done, you need to take that little green spatula and stuff the cream into the piping bag given. We say this is the toughest part if you don't want both creams to mix and turn into an ugly mush.
Its also the part that took us the longest. But between both Sil and I we managed to get both creams in without causing a sugary holocaust on the table.
Tadaa! By this point I was already cursing my ass off, and Sil was laughing at me most of the time. But the real fun was yet to come!

Stick around for Pt 2! When the end results of the madness await!

Welcome to SugarNoms

Yay, the blog is finally up! Lol